LIFESTYLE
Acoustic Ceiling Installation: A Comprehensive Guide
Looking to enhance the acoustics of your space? Acoustic ceiling installation might just be the answer you’re searching for. Whether it’s a bustling office or a cozy home, the benefits of this innovative solution are hard to ignore. Say goodbye to echoing corridors and distracting noises, and say hello to a more peaceful environment.
Acoustic ceilings work wonders in improving sound quality, absorbing unwanted noise, and creating a serene atmosphere. Not only do they provide acoustic comfort, but they also offer aesthetic appeal with their sleek designs. No wonder acoustic ceiling installation has become increasingly popular in both commercial and residential buildings.
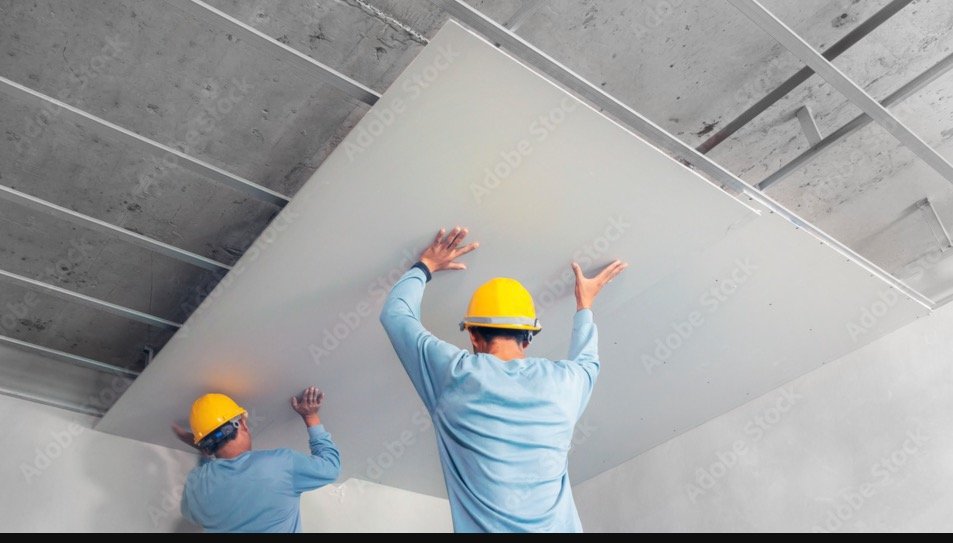
Acoustic Ceiling Installation
So why settle for ordinary when you can have extraordinary acoustics? Let’s dive into the world of acoustic ceiling installation and discover how it can transform your space into an oasis of tranquility.
Types of Acoustic Ceiling Materials
Choosing the right materials is crucial for achieving optimal sound absorption and aesthetic appeal. Understanding the unique properties and advantages of each material will help you make an informed decision based on your specific needs and preferences.
Fiberglass
Fiberglass is a popular choice for acoustic ceiling installations due to its excellent sound-absorbing capabilities. Made from fine fibers of glass woven together, it effectively reduces echo and reverberation in a room. Fiberglass panels are lightweight and easy to install, making them ideal for both residential and commercial applications.
Advantages of fiberglass:
-
Superior sound absorption: The porous nature of fiberglass allows it to trap sound waves effectively.
-
Versatility: Fiberglass panels come in various sizes, shapes, and colors, providing flexibility in design choices.
-
Durability: With proper maintenance, fiberglass ceilings can last for years without losing their effectiveness.
Mineral Fiber
Another commonly used material for acoustic ceilings is mineral fiber. Composed of natural or synthetic minerals mixed with binders such as starch or clay, mineral fiber panels offer excellent sound insulation while maintaining a visually appealing appearance.
Advantages of mineral fiber:
-
Soundproofing qualities: Mineral fiber absorbs sound vibrations efficiently due to its dense composition.
-
Fire resistance: Mineral fiber is inherently fire-resistant and can contribute to overall building safety.
-
Moisture resistance: Some mineral fiber panels have moisture-resistant properties that make them suitable for humid environments like bathrooms or kitchens.
Perforated Metal
For those seeking a more contemporary look in their acoustic ceiling installation, perforated metal offers a sleek and modern option. Typically made from aluminum or steel with small holes punched throughout the surface, perforated metal panels provide both functionality and aesthetic appeal.
Advantages of perforated metal:
-
Visual appeal: The perforations in the metal panels create an eye-catching design element, adding a touch of elegance to any space.
-
Enhanced sound diffusion: The holes in the metal allow sound waves to pass through, reducing echo and creating a more balanced acoustic environment.
-
Durability: Perforated metal is highly resistant to wear and tear, making it suitable for high-traffic areas.
Choosing the right acoustic ceiling material depends on your specific requirements. Consider factors such as the level of sound absorption needed, visual preferences, and environmental conditions. By understanding the unique properties and advantages of fiberglass, mineral fiber, and perforated metal, you can make an informed decision that enhances both the functionality and aesthetics of your space.
Planning and Preparation for Acoustic Ceiling Installation
Proper planning is crucial before embarking on an acoustic ceiling installation project. This stage sets the foundation for a successful and efficient installation process, ensuring that all necessary factors are taken into account.
Importance of Proper Planning
Planning plays a pivotal role in any construction or renovation project, and acoustic ceiling installation is no exception. By investing time in meticulous planning, you can avoid potential pitfalls and ensure smooth execution. A well-thought-out plan allows you to identify potential challenges beforehand and develop strategies to overcome them effectively.
Accurate Measurement Techniques
Accurately measuring the area where the acoustic ceiling will be installed is paramount to achieving optimal results. Before commencing any work, take precise measurements to determine the exact dimensions of the space. This will help you calculate the materials required accurately, preventing wastage or shortages during the installation process.
To measure effectively, start by dividing your workspace into smaller sections if necessary. Measure each section individually using a tape measure or laser measuring device. Take note of any irregularities such as protruding walls or columns that may affect the layout or positioning of the acoustic ceiling tiles.
Essential Considerations During Planning
During the planning phase of an acoustic ceiling installation project, several crucial considerations need attention:
-
Lighting Fixtures: Determine how lighting fixtures will integrate with your new acoustic ceiling system. Consider whether recessed lights or surface-mounted fixtures are more suitable for your space.
-
HVAC Systems: Evaluate how HVAC systems will interact with your acoustic ceiling installation. Ensure proper ventilation and assess if modifications are needed to accommodate air vents or ductwork.
-
Access Points: Identify access points such as doors, hatches, or panels that might require special attention during installation. Plan accordingly to ensure easy access for maintenance or repairs in the future.
By addressing these considerations early on, you can avoid potential conflicts between the acoustic ceiling and other essential elements of your space.
Step-by-Step Guide to Installing an Acoustic Ceiling
Installing an acoustic ceiling can greatly enhance the aesthetics and acoustics of a room. Whether you’re looking to reduce noise levels in a home theater or create a more pleasant environment in an office space, following a detailed step-by-step guide will ensure a successful installation from start to finish.
Necessary Tools for Acoustic Ceiling Installation
Before diving into the installation process, it’s important to gather all the necessary tools. Here are some essential items you’ll need:
-
Measuring tape: Accurate measurements are crucial for ensuring a precise fit.
-
Utility knife: This versatile tool will come in handy for cutting ceiling tiles and other materials.
-
Screwdriver or drill: Used for securing the suspension system and attaching the tiles.
-
Level: Ensures that your ceiling is straight and even.
-
Safety equipment: Don’t forget to prioritize safety by wearing goggles, gloves, and a dust mask.
Safety Precautions During Installation
Safety should always be a top priority when working on any home improvement project. When installing an acoustic ceiling, keep these precautions in mind:
-
Turn off electricity: Before starting any work, switch off the power supply to avoid electrical hazards.
-
Secure ladders: Make sure your ladder is stable and secure before climbing up to install the ceiling.
-
Protect yourself: Wear appropriate safety gear such as goggles, gloves, and a dust mask to safeguard against potential injuries or respiratory issues.
Techniques for Acoustic Ceiling Installation
To achieve professional-looking results with your acoustic ceiling installation, consider these techniques:
-
Plan your layout: Measure the dimensions of your room and plan how you want the tiles arranged beforehand.
-
Install suspension system: Begin by installing the metal grid suspension system according to manufacturer instructions.
-
Attach hangers: Secure hangers at regular intervals along the perimeter of the room to support the grid system.
-
Install main tees: Place the main tees perpendicular to the joists, ensuring they are level and securely attached.
-
Add cross tees: Connect the cross tees to the main tees, creating a grid pattern that will hold the ceiling tiles.
-
Cut and install tiles: Measure and cut ceiling tiles as needed, fitting them into the grid system until the entire ceiling is covered.
Tips for Achieving a Professional-Looking Finish
To elevate your acoustic ceiling installation and achieve a polished appearance, consider these practical tips:
-
Use adhesive: Apply adhesive to ensure secure attachment of tiles within the grid system.
-
Paint or apply finish: Consider painting or applying a finish to the tiles for added visual appeal.
-
Conceal edges: Utilize edge trim or molding to create a seamless transition between walls and ceiling.
-
Maintain cleanliness: Regularly clean your acoustic ceiling using appropriate methods and products to preserve its appearance over time.
By following this step-by-step guide, employing necessary tools, adhering to safety precautions, and implementing professional techniques, you can successfully install an acoustic ceiling that enhances both aesthetics and acoustics in any space. So why wait? Get started on transforming your room today!
Maintenance Tips for Acoustic Ceilings
Regular maintenance is crucial for preserving the performance and appearance of your acoustic ceilings. By following simple cleaning techniques and implementing preventive measures, you can ensure that your acoustic ceilings remain in top condition for years to come.
Importance of Regular Maintenance
Acoustic ceilings not only enhance the aesthetic appeal of a space but also serve functional purposes such as sound absorption and insulation. To maintain their effectiveness, it is essential to conduct regular maintenance. Neglecting this aspect can lead to a decline in performance and an unsightly appearance.
Cleaning Techniques
-
Dust Removal:
-
Use a soft-bristle brush or vacuum cleaner with a brush attachment to gently remove dust from the surface of the acoustic ceiling.
-
Ensure that the vacuum cleaner has a HEPA filter to prevent dust particles from being released back into the air.
-
-
Stain Removal:
-
For water-based stains, use mild soap or detergent mixed with warm water. Gently scrub the stained area with a sponge or cloth.
-
Oil-based stains can be challenging to remove. In such cases, use a specialized stain remover recommended by the manufacturer.
-
-
Mold and Mildew Prevention:
-
Maintain proper ventilation in the room to prevent excessive moisture buildup, which can lead to mold and mildew growth on acoustic ceilings.
-
If mold or mildew does appear on the ceiling, clean it immediately using a mixture of equal parts water and vinegar or hydrogen peroxide solution.
-
Preventive Measures
-
Avoid Excessive Moisture:
-
Be cautious while installing acoustic ceilings in areas prone to high humidity levels, such as bathrooms or kitchens.
-
Install exhaust fans or dehumidifiers in these spaces to minimize moisture accumulation.
-
-
Protect Against Physical Damage:
-
Take precautions during activities like moving furniture or conducting repairs near acoustic ceilings by using drop cloths or covering them adequately.
-
Avoid hanging heavy objects directly from the ceiling as this can cause damage and compromise the acoustical properties.
-
-
Regular Inspections:
-
Periodically inspect your acoustic ceilings for any signs of damage, such as cracks, sagging, or discoloration.
-
Address any issues promptly to prevent further deterioration and costly repairs.
-
By following these maintenance tips, you can extend the lifespan of your acoustic ceilings while maintaining their optimal performance. Remember to consult the manufacturer’s guidelines for specific care instructions based on the type of acoustic ceiling material used in your space.
Upgrading Your Acoustic Ceiling: Advanced Techniques and Trends
Explore advanced techniques like adding insulation or incorporating decorative elements into your existing acoustic ceilings.
There are several advanced techniques that can take your space to the next level. One option is to consider adding insulation to your existing acoustic ceiling. Insulation not only helps with soundproofing but also improves energy efficiency by reducing heat transfer between rooms. By incorporating insulation into your ceiling, you can create a more comfortable and quiet environment.
Another technique to explore is incorporating decorative elements into your acoustic ceilings. Gone are the days of plain, boring ceiling panels. With advancements in design and technology, you can now choose from a wide range of visually appealing options that enhance the aesthetics of any room. From textured panels that add depth and dimension to custom-printed designs that reflect your unique style, there’s no shortage of possibilities.
To give you an idea of what’s available, here are some examples:
-
Textured panels: These panels come in various patterns and styles, such as geometric shapes or natural textures like wood grain or stone finishes.
-
Custom-printed designs: With this option, you have the freedom to print any image or pattern onto your acoustic ceiling panels. Whether it’s a scenic landscape or a company logo, the choice is yours.
-
Integrated lighting: Consider installing LED lights within your acoustic ceiling for an added touch of elegance and functionality. This not only provides ambient lighting but also eliminates the need for additional fixtures hanging from the ceiling.
Stay updated with current trends in design and technology related to acoustic ceilings.
In order to stay ahead in the world of interior design, it’s essential to keep up with the latest trends in acoustic ceilings. By staying informed about new materials, technologies, and design concepts, you can ensure that your space remains modern and visually appealing.
Here are some current trends worth exploring:
-
Sustainable materials: With a growing focus on environmental consciousness, acoustic ceiling manufacturers are now offering sustainable options. These materials are made from recycled content or renewable resources, making them an eco-friendly choice.
-
Biophilic design: This trend emphasizes the connection between humans and nature. Incorporating elements like plants or natural textures into your acoustic ceiling can create a calming and rejuvenating atmosphere.
-
Acoustic baffles: Baffles are suspended panels that help control sound reflections in large spaces. They not only improve acoustics but also add a contemporary touch to any room.
-
Integrated technology: As smart homes become more prevalent, acoustic ceilings with integrated technology are gaining popularity. Imagine controlling your lighting, sound system, and temperature through your ceiling panels.
Discover innovative ways to enhance both aesthetics and functionality through upgrades.
Upgrading your acoustic ceiling is not only about improving its appearance but also enhancing its functionality. By exploring innovative techniques and designs, you can achieve a balance between aesthetics and practicality.
Here are some ideas to consider:
-
Acoustic clouds: These suspended panels not only absorb sound but also act as decorative elements that can transform the look of any space. They come in various shapes and sizes, allowing for creative configurations.
-
Soundproofing solutions: If noise reduction is a top priority for you, consider installing additional soundproofing materials alongside your acoustic ceiling. This could include adding extra layers of insulation or using specialized sound-absorbing panels.
Troubleshooting Common Issues with Acoustic Ceilings
Acoustic ceilings are a popular choice for many homeowners and businesses due to their sound-absorbing properties and aesthetic appeal. However, like any other construction feature, they can encounter problems over time. We will also explore effective solutions to address these issues and restore the quality of your acoustic ceilings.
Sagging Ceilings
One of the most common problems faced by acoustic ceiling owners is sagging. This can occur due to several reasons, including improper installation or moisture buildup. To troubleshoot this issue:
-
Identify the cause: Inspect the area to determine if there is excessive moisture or if the ceiling tiles were not properly attached.
-
Fixing minor sagging: For minor sagging caused by loose tiles, gently push them back into place and secure them properly.
-
Addressing major sagging: If the sagging is significant or widespread, it’s best to seek professional assistance. They can evaluate the situation and provide appropriate solutions such as reinforcing support structures or replacing damaged tiles.
Discoloration
Over time, acoustic ceilings may develop unsightly discoloration due to various factors like water leaks or smoke exposure. Here’s how you can troubleshoot this issue:
-
Identify the source: Determine whether discoloration is caused by water damage, smoke exposure, or other factors.
-
Water damage: If discoloration is a result of water leaks or condensation, fix any underlying plumbing issues and ensure proper ventilation in the area.
-
Smoke exposure: If smoke has caused discoloration on your acoustic ceiling tiles, consider repainting them after thoroughly cleaning the surface.
Water Damage
Water damage can pose a significant threat to acoustic ceilings as it weakens their structure and can lead to mold growth. To troubleshoot water damage:
-
Identify the source: Determine the cause of water damage, such as a leaking roof or plumbing issue.
-
Fix the source: Address the root cause by repairing any leaks or fixing plumbing problems promptly.
-
Assess the damage: Check for signs of mold growth or structural weakening caused by water exposure.
-
Mold remediation: If mold is present, seek professional assistance to safely remove it and restore your acoustic ceiling’s integrity.
It’s important to note that while some minor issues with acoustic ceilings can be resolved independently, more complex problems may require professional intervention. Seeking expert advice ensures proper diagnosis and appropriate solutions, saving you time and potential further damage.
By troubleshooting common issues like sagging, discoloration, and water damage in your acoustic ceilings, you can maintain their functionality and aesthetic appeal for years to come.
Benefits of Acoustic Ceiling Installation
Installing an acoustic ceiling offers a range of benefits that can greatly improve the overall environment and functionality of various spaces. From enhanced sound insulation to increased comfort and energy savings, acoustic ceilings have become a popular choice in settings such as offices, classrooms, and healthcare facilities.
Improved Sound Insulation and Speech Intelligibility
One of the primary advantages of acoustic ceiling installation is its ability to significantly improve sound insulation. By reducing noise transmission between rooms or floors, these ceilings create a more peaceful and productive environment. Whether it’s minimizing distractions in an open-plan office or ensuring privacy in healthcare facilities, acoustic ceilings help maintain a quieter atmosphere.
Speech intelligibility is greatly enhanced with the use of acoustic ceilings. These specialized installations absorb excess sound waves, preventing them from bouncing around the room and causing echoes or reverberations. As a result, conversations become clearer and easier to understand, promoting effective communication in any setting.
Enhanced Comfort and Productivity
Acoustic ceilings play a crucial role in enhancing comfort levels for occupants. By absorbing sound vibrations, they reduce ambient noise levels, creating a more pleasant environment for employees, students, patients, or visitors. This improved comfort leads to increased focus and productivity.
In office spaces where concentration is key for completing tasks efficiently, the installation of acoustic ceilings helps minimize distractions caused by noisy equipment or conversations. Similarly, classrooms benefit from reduced background noise levels as students can concentrate better on their studies without being disturbed by external sounds.
Healthcare facilities also rely on acoustic ceiling installations to provide patients with a calm and soothing environment conducive to healing. By reducing noise pollution from medical equipment or busy hallways, these ceilings contribute to an overall sense of tranquility within healthcare settings.
Potential Energy-Saving Benefits
Beyond their impact on acoustics and comfort levels, acoustic ceiling installations can offer potential energy-saving benefits as well. These specialized ceilings often incorporate thermal insulation properties, which help regulate indoor temperature and reduce the need for excessive heating or cooling. As a result, energy consumption is minimized, leading to cost savings and more environmentally friendly space.
Moreover, acoustic ceilings can contribute to improved lighting efficiency. By utilizing reflective surfaces or incorporating integrated lighting systems, these ceilings optimize natural and artificial light distribution within a room. This not only enhances visibility but also reduces the reliance on additional lighting fixtures, further reducing energy consumption.
Conclusion: Summary of Acoustic Ceiling Installation
In conclusion, acoustic ceiling installation offers a range of benefits for both residential and commercial spaces. By using specialized materials and techniques, you can effectively control noise levels, enhance aesthetics, and improve the overall comfort of a room.
Throughout this guide, we have explored various aspects of acoustic ceiling installation. We discussed different types of materials available, such as fiberglass panels and mineral fiber tiles, each offering unique sound-absorbing properties. Planning and preparation were emphasized as crucial steps to ensure a successful installation process.
We provided a step-by-step guide that outlined the key stages involved in installing an acoustic ceiling. From measuring the space to cutting and attaching the panels or tiles, our instructions aimed to simplify the process for you. We shared valuable maintenance tips to help prolong the lifespan of your acoustic ceiling.
For those seeking more advanced techniques and trends in acoustic ceiling installation, we highlighted options for upgrading your existing ceiling. These include incorporating LED lighting fixtures or integrating acoustical clouds for enhanced sound absorption.
In addressing common issues with acoustic ceilings, we offered troubleshooting advice to tackle problems such as sagging or staining. Our goal is to equip you with practical solutions so that you can maintain a high-quality acoustic environment effortlessly.
The benefits of acoustic ceiling installation cannot be overstated. Not only does it reduce noise pollution by absorbing sound waves effectively, but it also enhances speech intelligibility within a room. Moreover, these ceilings contribute to energy efficiency by improving insulation capabilities.
To take full advantage of all that an acoustic ceiling has to offer, consider consulting with professionals who specialize in this field. Their expertise will ensure optimal results tailored specifically to your needs.
Now that you have gained insights into the world of acoustic ceiling installation, it’s time to transform your space into one that offers superior acoustics while maintaining visual appeal. Implementing these techniques will undoubtedly create an environment where tranquility reigns supreme.
FAQs
Q: How long does it take to install an acoustic ceiling?
The time required for installation depends on various factors, including the size of the space and the complexity of the design. However, a professional installation team can typically complete the process within a few days.
Q: Can I install an acoustic ceiling myself, or should I hire professionals?
While it is possible to install an acoustic ceiling yourself, hiring professionals is recommended for optimal results. They possess the necessary expertise and equipment to ensure a seamless and efficient installation.
Q: Are there any specific maintenance requirements for acoustic ceilings?
Acoustic ceilings generally require minimal maintenance. Regular cleaning with a soft brush or vacuum cleaner attachment can help remove dust and maintain its appearance. It’s important to avoid using harsh chemicals or abrasive materials that may damage the surface.
Q: Will installing an acoustic ceiling reduce energy costs?
Yes, acoustic ceilings contribute to energy efficiency by improving insulation capabilities. They help regulate temperature fluctuations, reducing reliance on heating or cooling systems and ultimately leading to potential energy savings.
Q: Can upgrading my existing acoustic ceiling enhance its performance?
Absolutely! Upgrading your existing acoustic ceiling with advanced techniques like incorporating LED lighting fixtures or integrating acoustical clouds can significantly enhance both sound absorption and visual appeal in your space.


Mortgage Rates Climb to an 11-Month High, and Buyers Retreat Fast

FCC Sets August 6 Vote to Erase the 39% TV Ownership Cap

Netflix Heads Into Earnings With Its 2022 Playbook Already Spent

China’s Economy Grows Just 4.3% as Exports Boom and Households Retreat

United Airlines Beats Earnings Estimates Despite $6 Billion Fuel Hit

California’s Plastic Packaging Law Draws Fire From Every Side

xAI Sues a Grok User for CSAM Deepfakes It Struggled to Stop

US Stocks Edge Within 0.5% of a Record as Oil Climbs on War

BlackRock’s Private Markets Bet Pays Off With a Record $15 Trillion in Assets

Kalshi Traders See 93% Odds Gas Tops $4 as Iran Strikes Return

Halo Studios Reverses PS Plus for Halo: Campaign Evolved on PS5

Black Ops 1 and 2 PS5 Ports: $40 Price Tag Has Fans Uneasy

Matt Brown Dismisses Rousey and Paul’s MVP MMA Ratings Win Over UFC

Star Wars: Galactic Racer Is a Roguelite Racer With a Podracing Skin

Julius Randle Traded to Nets as Wolves Reclaim Cap Space for Dosunmu

Sega’s $49.99 Sonic Classic and Modern Bundles Hit Switch in October

Colombia Edge DR Congo as Muñoz Books World Cup Knockout Place

Douze Dixièmes Closes Five Months After MIO: Memories in Orbit

Warriors Take Yaxel Lendeborg, the Oldest Pick in the 2026 NBA Draft

Meta’s Muse Image Lets Anyone Use Your Instagram Photos in AI
-

 TECHNOLOGY3 years ago
How to Adjust a Bulova Watch Band – An Easy Guide
-

 News3 years ago
Fred Pentland: Athletic Bilbao’s English mentor who changed the essence of Spanish football
-

 FINANCE3 years ago
Tax Planning for Every Season: Guide to Maximizing Your Tax Benefits
-

 Education3 years ago
African Ministers New Education Plan
-

 BUSINESS3 years ago
What is Entrepreneurial Operating System? A Comprehensive Guide to EOS
-

 Education3 years ago
Innovate Your Learning Journey with Technology and Enhance Education
-

 News3 years ago
Russians formally out of World Athletics Championships
-

 BUSINESS3 years ago
Top 9 Most Expensive American Cities to Rent an Apartment