LIFESTYLE
Expert Tile Flooring Installation Guide
Enhancing Your Space with Expertise: Are you looking to transform your space with stunning tile flooring? Look no further! Professional tile flooring installation guarantees a high-quality and durable finish that will leave you amazed. Say goodbye to the hassle of DIY projects and save time and effort by hiring a skilled professional.
Not only does professional installation ensure a flawless result, but it also enhances the aesthetics and value of your space. These experts have the expertise to handle even the most intricate patterns and designs, turning your vision into reality.
Tile Flooring Installation
With professional installers at your service, you can sit back, relax, and watch as your floors are transformed into works of art. Don’t settle for less when it comes to achieving the perfect tile flooring – trust the professionals who deliver excellence every step of the way!
So why wait? Elevate your space with expertly installed tile flooring today!
Benefits of Hiring a Professional for Tile Flooring Installation
Necessary Tools and Equipment for Precise Installations
Precision is key. A professional tile installer has the necessary tools and equipment to ensure a precise installation. From specialized cutters to high-quality adhesives, professionals are equipped with everything needed to achieve flawless results.
Using the right tools not only ensures accuracy but also saves time and effort. Professionals have extensive experience in handling these tools effectively, allowing them to work efficiently without compromising on quality. By hiring a professional, you can be confident that your tile flooring will be installed with the utmost precision.
Proper Subfloor Preparation Preventing Future Issues
A crucial aspect of tile flooring installation is subfloor preparation. Without proper preparation, you may encounter various issues down the line such as uneven tiles, cracks, or loose grout. Hiring experts ensures that your subfloor is adequately prepared before installation, preventing such problems from arising in the future.
Professional installers have an eye for detail. They know how to address any existing imperfections or weaknesses before proceeding with the installation process. This meticulous approach guarantees a solid foundation for your tile flooring and enhances its durability.
Guidance on Selecting the Right Tiles for Your Project
Selecting the right tiles can significantly impact the overall aesthetics and functionality of your space. With numerous options available in terms of material, color, size, and pattern, making a decision can be overwhelming. This is where professional installers come in handy.
Experienced tile installers possess valuable knowledge about different tile types and their suitability for specific areas within your home or commercial space. They can offer guidance based on factors such as foot traffic, moisture levels, and design preferences. Their expertise ensures that you choose tiles that not only enhance the visual appeal but also withstand daily wear and tear.
Efficient Completion Minimizing Disruptions
Attempting a DIY tile flooring installation can be time-consuming, especially if you lack experience in this field. On the other hand, professionals are well-versed in the installation process and can efficiently complete the job.
By hiring experts, you eliminate the need for trial and error, saving both time and effort. Professionals work diligently to complete the installation within a reasonable timeframe while maintaining high-quality standards. This ensures minimal disruptions to your daily routine or business operations.
Understanding different types of tiles for your flooring project
Ceramic tiles are versatile, affordable, and available in various colors and styles.
Ceramic tiles are a popular choice for homeowners due to their versatility and affordability. They come in a wide range of colors and styles, making it easy to find the perfect match for any home decor. Whether you prefer a sleek modern look or a more traditional design, ceramic tiles can meet your needs.
One of the advantages of ceramic tiles is their durability. They are resistant to wear and tear, making them suitable for high-traffic areas such as kitchens and bathrooms. They are easy to clean, requiring only regular sweeping or mopping to maintain their appearance.
Another benefit of ceramic tiles is their water resistance. This makes them an excellent choice for areas prone to moisture, such as bathrooms or laundry rooms. With proper installation and maintenance, ceramic tiles can withstand exposure to water without warping or deteriorating.
Porcelain tiles are highly durable, resistant to moisture, stains, and scratches.
If you’re looking for even greater durability than ceramic tiles offer, porcelain tiles might be the perfect option for your flooring project. Porcelain is made from denser clay fired at higher temperatures compared to ceramic tiles. This process results in a tile that is highly resistant to moisture, stains, and scratches.
Porcelain tiles are an ideal choice for high-traffic areas where durability is crucial. They can withstand heavy foot traffic without showing signs of wear and tear. Their resistance to moisture makes them suitable for both indoor and outdoor applications.
In terms of maintenance, porcelain tiles require minimal effort. Regular sweeping or vacuuming followed by damp mopping is usually sufficient to keep them clean. Their stain-resistant properties make accidental spills less worrisome since they can be easily wiped away without leaving permanent marks on the surface.
Porcelain Tiles vs. Ceramic Tiles
| Features | Porcelain Tiles | Ceramic Tiles |
|---|---|---|
| Durability | Highly durable | Less durable |
| Moisture Resistance | Highly resistant | Less resistant |
| Stain Resistance | Highly resistant | Less resistant |
| Scratch Resistance | Highly resistant | Less resistant |
| Suitable for Outdoors | Yes | No |
| Maintenance | Minimal effort | Minimal effort |
Natural stone tiles like marble or granite add elegance but require regular maintenance.
For those seeking a touch of elegance and sophistication, natural stone tiles such as marble or granite can be an excellent choice. These tiles add a luxurious and timeless appeal to any space, making them particularly popular for upscale residential and commercial projects.
Marble tiles are known for their unique veining patterns and smooth texture, while granite tiles offer a more granular appearance with various colors and patterns. Both options create a stunning visual impact that can elevate the overall aesthetic of your home.
However, it’s important to note that natural stone tiles require regular maintenance to preserve their beauty. They are porous materials, meaning they can absorb liquids and stains if not properly sealed. Regular sealing is necessary to protect the surface from moisture damage and maintain its original luster.
Glass tiles create a unique visual appeal with their translucent properties.
If you want to make a bold statement with your flooring project, glass tiles provide a unique visual appeal. Their translucent properties allow light to pass through, creating an eye-catching effect that adds depth and brightness to any room.
Glass tiles come in various colors, shapes, sizes, and finishes, allowing for endless design possibilities. Whether you prefer vibrant hues or subtle tones, there is a glass tile option to suit your style preferences.
While glass tiles are undeniably beautiful, it’s essential to consider their practicality as well. They are more prone to scratching compared to other tile types;
A step-by-step guide to preparing the floor for tile installation
Proper preparation of the floor is crucial. Whether you’re renovating your bathroom or upgrading your kitchen, taking the time to prepare the floor will ensure a smooth and long-lasting tile installation. Here’s a step-by-step guide to help you get started:
Remove existing flooring materials
Begin by removing any existing flooring materials to expose the subfloor. This may include carpet, vinyl, or laminate. Use appropriate tools such as a pry bar or scraper to carefully lift and detach these materials. Make sure to dispose of them responsibly.
Check subfloor condition
Once the old flooring is removed, inspect the subfloor for any signs of damage or moisture. Ensure that it is clean, level, dry, and structurally sound before proceeding with tile installation. If there are any issues with the subfloor, address them promptly to avoid future problems.
Apply underlayment or backer board
To create a smooth surface for your tiles, apply an appropriate underlayment or backer board over the subfloor. Underlayment materials such as cement boards or uncoupling membranes provide stability and prevent cracks from forming in your tiles over time. Follow manufacturer instructions for proper installation.
Leveling compounds and shims
Even with a clean and level subfloor, there might be slight unevenness that needs correction before laying tiles. In such cases, use leveling compounds or shims strategically placed beneath the underlayment to rectify any imperfections. These products help create a flat surface for optimal tile adhesion and minimize potential lippage between tiles.
Prepare grout lines
Before moving forward with tiling, consider how you want your grout lines positioned. Decide on either uniform spacing using spacers or opt for tight joints without spacers for a seamless look. Plan ahead and mark reference lines on the underlayment to guide your tile placement.
Ensure proper ventilation
Proper ventilation is essential during the entire installation process. Open windows or use fans to provide adequate air circulation, especially if you’re working with adhesives or leveling compounds that emit strong odors. Ventilation helps in expediting the drying process and maintaining a healthy environment.
Prime the surface
Before applying any adhesives or mortar, prime the surface of the underlayment or backer board. Priming promotes better adhesion and prevents moisture from seeping into the subfloor. Follow manufacturer instructions for selecting an appropriate primer and application method.
Waterproofing (if necessary)
In areas prone to water exposure, such as bathrooms or laundry rooms, consider applying a waterproofing membrane over the underlayment. This extra layer of protection ensures that moisture doesn’t penetrate through to the subfloor, preventing potential damage and mold growth.
Preparing your floor for tile installation requires attention to detail and careful execution. By following these step-by-step guidelines, you’ll create a solid foundation for your new tiles while ensuring their longevity and durability. Remember, taking the time to properly prepare now will save you headaches down the road!
Tools and Materials Needed for a Successful Tile Flooring Installation
To ensure a successful tile flooring installation, it is crucial to have the right tools and materials at hand. From trowels to sealant, each item plays a significant role in achieving professional results. Here are the essential tools and materials you will need:
Essential Tools
-
Trowels: These are used to spread adhesive mortar or thin-set evenly on the surface before laying the tiles. A notched trowel helps create ridges for better adhesion.
-
Spacers: These small plastic pieces maintain consistent spacing between tiles, ensuring uniformity and allowing room for grout.
-
Tile Cutters: Cutting tiles to fit specific areas is inevitable during installation. Tile cutters come in various types such as snap cutters, wet saws, or handheld scoring tools.
-
Grout Floats: After placing the tiles, grout floats are used to apply grout into the joints between them smoothly.
-
Notched Trowels: These specialized trowels have notches of different sizes on their edges, which help control the thickness of adhesive mortar or thin-set.
Required Materials
-
Adhesive Mortar or Thinset: This acts as a bonding agent between the tiles and the surface they are being installed on. Choose an appropriate type based on your project requirements.
-
Grout: Once the tiles are laid out and secured, grout fills in the gaps between them, providing stability and preventing moisture penetration.
-
Sealant: Applying sealant over grouted areas helps protect against stains and water damage while enhancing durability.
-
Backer Board Screws/Nails: If you’re installing tile over a subfloor or backer board, screws or nails specifically designed for this purpose will secure it firmly in place.
Safety Equipment
During any flooring installation project, safety should be a top priority. Here are some essential safety equipment items to consider:
-
Goggles: Protect your eyes from flying debris, especially when cutting tiles or drilling holes.
-
Knee Pads: Installing tile floors often involves kneeling for extended periods. Knee pads provide cushioning and protect your knees from strain.
By having the right tools and materials, you set yourself up for a successful tile flooring installation. Remember to prioritize safety by utilizing protective gear like goggles and knee pads. With these essentials in hand, you’ll be well-prepared to tackle your project with confidence and achieve professional results.
Techniques for laying tiles efficiently and accurately
Laying tiles professionally requires a combination of accuracy, efficiency, and attention to detail. Whether you’re a seasoned professional or a DIY enthusiast, following the right techniques can make all the difference in achieving a flawless tile flooring installation. Let’s explore some essential tips and tricks to help you lay tiles efficiently and accurately.
Measure the room accurately
Before starting any tile installation project, it’s crucial to measure the room accurately. This step helps determine layout patterns and ensures you have enough tiles for the job. Use a measuring tape to measure the length and width of the room, taking note of any irregularities or angles that may affect your layout plan. By having precise measurements, you can avoid unnecessary mistakes and save time by ordering the correct quantity of tiles.
Create reference lines with a chalk line
Creating reference lines is an important step in ensuring accurate tile placement. To achieve this, use a chalk line tool to mark straight lines on the floor surface. Start by snapping one horizontal line across the middle of the room and another vertical line intersecting it at 90 degrees. These reference lines will serve as guides for aligning your tiles perfectly.
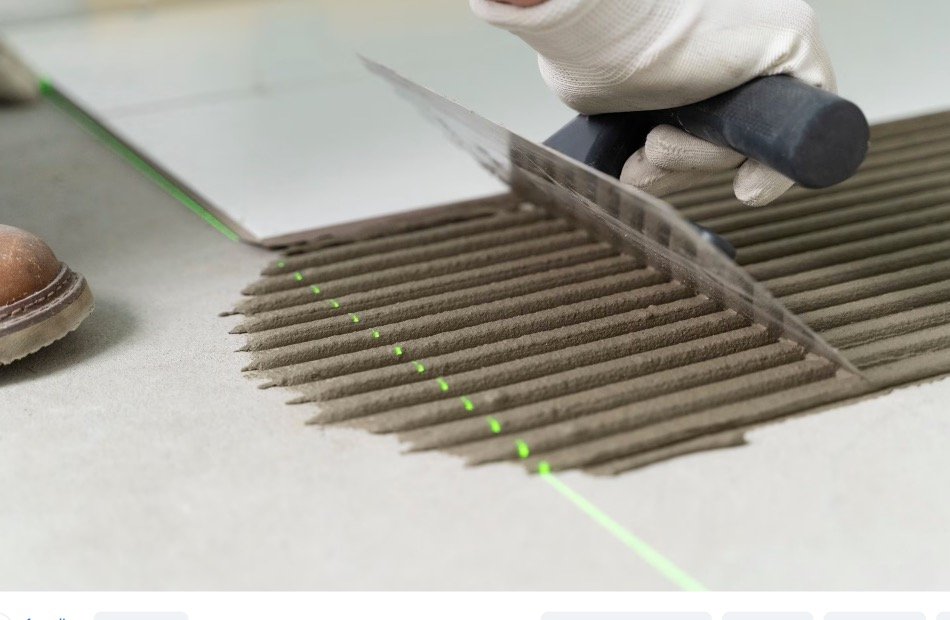
Apply adhesive mortar evenly
To securely adhere your tiles to the floor surface, apply adhesive mortar or thin-set evenly using a notched trowel. The size of the notches on your trowel will depend on the type and size of tiles being used. Spread an even layer of mortar over a small section of the floor at a time, ensuring complete coverage within each section before moving on. This technique prevents premature drying of mortar while providing sufficient bonding strength for long-lasting results.
Place tiles firmly with proper spacing
Once you’ve applied mortar, it’s time to place your tiles firmly onto it while maintaining proper spacing between each tile. Use tile spacers to ensure consistent gaps between tiles throughout your installation area. Spacers come in various sizes, allowing you to achieve the desired spacing for your specific project. Placing the tiles firmly ensures they adhere properly to the mortar, preventing any future issues with loose or uneven tiles.
By following these techniques for laying tiles efficiently and accurately, you can achieve professional-looking results that will enhance the beauty and functionality of your space. Remember to measure accurately, create reference lines, apply adhesive evenly, and place tiles firmly with proper spacing. With attention to detail and a little practice, you’ll become skilled at tile flooring installation in no time. So roll up your sleeves, grab your tools, and start transforming your floors with confidence!
Common Mistakes to Avoid During Tile Flooring Installation
Insufficient adhesive can cause tiles to loosen over time, so apply it generously.
One common mistake that many people make during tile flooring installation is not using enough adhesive. Insufficient adhesive can lead to tiles becoming loose and unstable over time. To ensure a secure and long-lasting installation, it is crucial to apply the adhesive generously.
When applying the adhesive, make sure to spread it evenly across the entire surface area of each tile. Use a notched trowel to create ridges in the adhesive, as this helps improve adhesion. Pressing down firmly on each tile after placement will help ensure proper contact with the adhesive.
Failure to properly mix grout can lead to weak joints and premature cracking.
Another mistake often made is improper mixing of grout. Grout serves as the filler between tiles, providing stability and preventing moisture from seeping beneath them. If grout is mixed incorrectly, it can weaken joints and result in premature cracking.
To avoid these issues, follow the manufacturer’s instructions carefully when mixing grout. Use a mixing paddle or drill attachment for thorough blending. It’s essential to achieve a consistent texture without any clumps or dry spots.
Once mixed, allow the grout to rest for a few minutes before applying it between the tiles. This resting period allows any air bubbles in the mixture to escape and ensures optimal performance. Apply the grout using a rubber float at a 45-degree angle, pushing it into all gaps evenly.
Neglecting to seal porous tiles can result in staining and damage from spills.
Porous tiles are more susceptible to absorbing liquids and stains compared to non-porous ones. Unfortunately, many homeowners overlook sealing their porous tiles during installation, leading to potential staining and damage from spills.
To protect your porous tiles effectively, apply an appropriate sealant before grouting them. The sealant acts as a barrier, preventing liquids from seeping into the tile and causing stains. It is important to choose a sealant that suits the specific type of tile you are installing.
Before applying the sealant, ensure that the tiles are clean and dry. Follow the manufacturer’s instructions for application, using a brush or roller to evenly distribute the sealant. Allow sufficient drying time before proceeding with grouting.
Inadequate curing time for grout can weaken its strength and durability.
Lastly, failing to provide adequate curing time for grout can compromise its strength and durability. Curing refers to the process of allowing the grout to dry and harden fully. Rushing this step can result in weaker joints and an increased risk of cracking.
Typically, grout requires at least 24-48 hours to cure properly before subjecting it to heavy foot traffic or moisture exposure. During this time, it is crucial to keep the area well-ventilated and avoid any contact or stress on the newly installed tiles.
By allowing ample curing time for your grout, you ensure that it reaches its maximum strength and durability. This will help maintain the integrity of your tile flooring installation over time.
Tips for achieving a professional finish in your tile flooring project
Planning the layout and pattern: Before diving into your tile flooring installation, it’s crucial to take the time to plan out the layout and pattern. This step sets the foundation for a professional finish. Consider the size and shape of your tiles, as well as the overall design aesthetic you want to achieve. By planning ahead, you can avoid awkward cuts or misaligned patterns that can detract from the final look.
Ensuring consistent spacing between tiles: Consistency is key. To ensure even spacing between tiles, make use of spacers throughout your project. These small plastic devices are placed between each tile, maintaining an equal distance and allowing for grout lines of uniform width. Spacers come in various sizes, so choose one that suits your desired spacing.
Cleaning excess adhesive or grout immediately: As you progress with your tile installation, it’s common to encounter excess adhesive or grout on the surface of the tiles. To maintain a polished appearance, it’s essential to clean up any residue promptly. Keep a damp sponge or cloth handy during the process and wipe away any excess adhesive or grout before it dries. This will prevent unsightly marks and make your finished floor look more professional.
Applying a high-quality sealer after grouting: To protect your newly installed tiles from stains and damage, applying a high-quality sealer is vital. Once you have completed the grouting process and allowed it to cure according to manufacturer instructions, carefully apply a suitable sealer over the entire tiled area. The sealer acts as a barrier against spills, dirt, and moisture while enhancing the longevity of your floor’s appearance.
Attention to detail is crucial at every stage. By following these tips – planning out your layout and pattern beforehand, using spacers for consistent spacing, promptly cleaning excess adhesive or grout, and applying a high-quality sealer – you can ensure a beautiful and professional finish.
Remember, taking the time to plan your layout will help you avoid costly mistakes and ensure that the final result meets your expectations. Using spacers throughout the installation process will maintain uniform spacing between tiles, creating a cohesive look. Keeping a damp sponge or cloth nearby to clean up excess adhesive or grout will prevent blemishes on your finished floor.
Finally, don’t forget the importance of applying a high-quality sealer after grouting. This step provides an extra layer of protection against stains and damage, preserving the beauty of your tile flooring for years to come. With these tips in mind, you’ll be well on your way to achieving a professional finish in your tile flooring project.
Maintaining and Caring for Your Newly Installed Tile Floor
Congratulations on your newly installed tile floor! To keep it looking its best and ensure its longevity, there are a few essential maintenance steps you should follow. By incorporating these simple practices into your cleaning routine, you can enjoy a beautiful and durable tile floor for years to come.
Regularly sweep or vacuum your tile floor to remove dirt and debris.
One of the easiest ways to maintain your tile floor is by regularly sweeping or vacuuming it. This helps prevent dirt, dust, and other particles from scratching the surface of the tiles or getting trapped in grout lines. Use a soft-bristle broom or a vacuum cleaner with a brush attachment to gently remove any loose debris.
Clean spills promptly using mild cleaners suitable for your specific type of tile.
Accidents happen, but it’s crucial to clean up spills as soon as they occur to prevent staining or damage to your tile floor. Start by blotting up any liquid with a clean cloth or paper towel. Then, depending on the type of tile you have, use a mild cleaner recommended by the manufacturer or a mixture of warm water and gentle dish soap. Avoid using harsh chemicals that may harm the tiles’ finish.
Avoid abrasive cleaning tools that may scratch or damage the surface of the tiles.
While it’s important to keep your tile floor clean, be cautious about the tools you use during the cleaning process. Abrasive materials like steel wool or rough scrub brushes can scratch or dull the surface of your tiles over time. Instead, opt for non-abrasive cleaning tools such as microfiber cloths, soft sponges, or mop heads specifically designed for tile floors.
Periodically reseal grout lines to maintain their appearance and prevent staining.
Grout lines play an integral role in both the aesthetic appeal and structural integrity of your tiled flooring. Over time, grout can become discolored or absorb stains, detracting from the overall appearance. To maintain the look of your grout lines, it is recommended to periodically reseal them. This process helps protect against moisture penetration and staining. Consult with a professional or refer to the manufacturer’s guidelines for the appropriate frequency and products to use for resealing.
By following these simple maintenance tips, you can ensure that your newly installed tile floor remains in pristine condition. Regular sweeping or vacuuming, prompt spill cleanup, avoiding abrasive cleaning tools, and periodic grout line resealing are all essential steps in caring for your tile flooring investment. With proper care and attention, your tile floor will continue to enhance the beauty of your space while providing durability that lasts for years to come.
Conclusion: Summary of key points about professional tile flooring installation
In conclusion, professional tile flooring installation offers numerous benefits that make it a wise choice for homeowners. Hiring a professional ensures that you receive expert guidance throughout the process, resulting in a high-quality and durable tile floor. Understanding the different types of tiles available helps you select the most suitable option for your specific project. Properly preparing the floor before installation is crucial to ensure a smooth and long-lasting result.
Having the right tools and materials is essential for a successful tile flooring installation. By employing efficient techniques, professionals can lay tiles accurately and efficiently, saving you time and effort. Avoiding common mistakes during the installation process guarantees a flawless finish.
To maintain your newly installed tile floor, it is important to follow proper care and maintenance practices. Regular cleaning and avoiding harsh chemicals will help preserve its appearance and longevity. Seeking professional advice on maintenance can further enhance the lifespan of your tile floor.
Remember that investing in professional tile flooring installation not only improves the aesthetics of your home but also adds value to your property. With their expertise, professionals ensure that every aspect of the project is handled meticulously from start to finish.
Make an informed decision by considering all these key points when planning your next tile flooring project. Don’t settle for subpar results; trust professionals to deliver exceptional craftsmanship that will exceed your expectations.
FAQs
Q: How long does it take to install tile flooring professionally?
A: The duration depends on various factors such as the size of the area, type of tiles used, and any additional preparations required. Generally, professional installers can complete a standard-sized room within a few days.
Q: Can I save money by installing tiles myself?
A: While DIY installations may seem cost-effective initially, they often lack precision and expertise which can lead to costly mistakes in the long run. Hiring professionals ensures quality workmanship and reduces potential expenses associated with errors.
Q: Are there any specific maintenance requirements for tile flooring?
A: Regular sweeping and mopping are usually sufficient to keep your tile floor clean. However, it is important to avoid using abrasive cleaners or tools that can damage the tiles. Consult with professionals for specific care instructions based on the type of tiles you have.
Q: Can I install tiles over an existing floor?
A: In some cases, it is possible to install tiles over an existing floor. However, proper evaluation and preparation by professionals are necessary to determine if this approach is suitable for your specific situation.
Q: How do I choose the right type of tile for my project?
A: Consider factors such as durability, style, and functionality when selecting tiles. Professionals can provide guidance based on your preferences and requirements, ensuring you choose the most appropriate option for your project.


SharePoint’s Fifth Exploited Flaw of 2026 Echoes Last July’s Hack

Claude Code Skips the Screen Takeover to Test iPhone Apps Live

Caitlin Clark Skips the WNBA 3-Point Contest for a Third Straight Year

Light Phone’s New Flip Runs Into the Same Chip Shortage as the iPhone

Apple’s $634 Million Masimo Verdict Stands, but Danaher Gets the Money

Rainout Gives Red Sox Two Shots at a Franchise-Record Win Streak

Apple Needed Four Tries to Truly Fix Its Hide My Email Leak

Samsung’s Record Chip Profits Are Shrinking Galaxy Z Fold 8 Deals

Sony’s PlayStation Disc Exit Repeats the Fight Xbox Lost in 2013

Samsung’s Record Chip Profits Are Quietly Pricing Its New Z Fold 8

Halo Studios Reverses PS Plus for Halo: Campaign Evolved on PS5

Black Ops 1 and 2 PS5 Ports: $40 Price Tag Has Fans Uneasy

Matt Brown Dismisses Rousey and Paul’s MVP MMA Ratings Win Over UFC

Star Wars: Galactic Racer Is a Roguelite Racer With a Podracing Skin

Julius Randle Traded to Nets as Wolves Reclaim Cap Space for Dosunmu

Sega’s $49.99 Sonic Classic and Modern Bundles Hit Switch in October

Colombia Edge DR Congo as Muñoz Books World Cup Knockout Place

Warriors Take Yaxel Lendeborg, the Oldest Pick in the 2026 NBA Draft

Douze Dixièmes Closes Five Months After MIO: Memories in Orbit

Warhammer Horus Heresy Super-Heavy Tanks Share a Plastic Chassis
-

 TECHNOLOGY3 years ago
How to Adjust a Bulova Watch Band – An Easy Guide
-

 News3 years ago
Fred Pentland: Athletic Bilbao’s English mentor who changed the essence of Spanish football
-

 FINANCE3 years ago
Tax Planning for Every Season: Guide to Maximizing Your Tax Benefits
-

 Education3 years ago
African Ministers New Education Plan
-

 BUSINESS3 years ago
What is Entrepreneurial Operating System? A Comprehensive Guide to EOS
-

 Education3 years ago
Innovate Your Learning Journey with Technology and Enhance Education
-

 News3 years ago
Russians formally out of World Athletics Championships
-

 BUSINESS3 years ago
Top 9 Most Expensive American Cities to Rent an Apartment